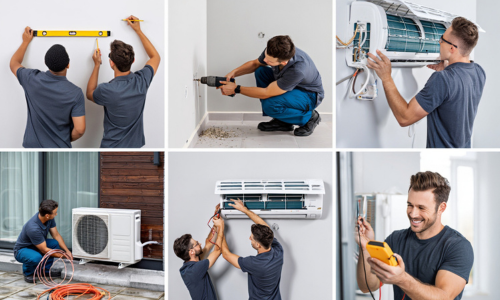
Step-by-Step Process of a Standard AC Installation
Planning to install a new cooling system? Understanding the Step-by-Step AC Installation Process is essential for achieving efficient cooling, saving energy, and preventing frequent breakdowns.
A properly installed air conditioner also improves indoor air quality, reduces electricity bills, and ensures long-lasting comfort. This guide covers every stage of the installation process—from site preparation to performance checks.
1. Pre-Installation Assessment: Planning for Efficiency
A successful AC installation begins with a thorough site inspection. During this phase, technicians look at:
-
Room Size & Load Calculations: To select the right AC capacity for efficient cooling.
-
Electrical Infrastructure: To confirm that wiring and circuit breakers can safely handle the system load.
-
Indoor Air Quality Factors: Proper ventilation and insulation help reduce energy wastage.
This step prevents problems like inadequate cooling, frequent tripping, or energy loss later.
2. Choosing the Ideal Location for Indoor and Outdoor Units
Correct placement improves cooling efficiency and minimizes energy loss.
-
Indoor Unit: Should be installed at a height of 7–8 feet on a wall with no obstacles for airflow. It must be away from heat sources like stoves and direct sunlight.
-
Outdoor Unit: Should be placed in a shaded, well-ventilated area with enough space for maintenance and heat dissipation.
Good placement also reduces noise and keeps the compressor in better condition.
3. Mounting the Indoor Unit
The indoor unit is mounted on a solid wall using a level gauge. This ensures:
-
Proper drainage of condensed water
-
Noise-free operation
-
Easy access for cleaning filters
Accurate alignment prevents water leakage and improves cooling performance.
4. Installing the Outdoor Unit
The outdoor unit contains the compressor and condenser coil. It is mounted on a concrete platform or wall brackets for stability.
Technicians may use anti-vibration pads to reduce noise and protect the building structure from vibrations.
5. Connecting Refrigerant Pipes, Drainage, and Wiring
Next, the technician connects:
-
Copper Pipes: For refrigerant flow between indoor and outdoor units
-
PVC Pipe: For drainage of condensed water
-
Electrical Wiring: For safe power connections
Proper insulation prevents energy loss and avoids water dripping issues inside the room.
6. Vacuuming the System and Charging Refrigerant
This is a critical step:
-
Vacuum Pumping: Removes moisture and air to prevent corrosion and freezing issues.
-
Refrigerant Charging: Adds the correct amount of refrigerant for optimal cooling.
Skipping this step can lead to poor cooling and higher energy bills.
7. Performance Testing and Safety Checks
After installation, the technician tests the system for:
-
Cooling efficiency and airflow
-
Refrigerant leaks
-
Noise and vibration levels
-
Electrical safety and grounding
Only after all checks are cleared is the AC handed over for use.
8. Demonstration and Maintenance Tips
Before leaving, the professional explains:
-
How to use the AC efficiently
-
How to clean filters regularly
-
Why annual maintenance is important
Regular servicing keeps your AC energy-efficient and extends its lifespan.
Advanced Tips for Energy Efficiency and Longevity
-
Use a programmable thermostat for better cooling schedules.
-
Get the coils cleaned annually to prevent dust buildup.
-
Schedule professional servicing every 6–12 months.
-
Monitor refrigerant levels to prevent cooling inefficiencies.
Why Professional AC Installation Matters
A professional AC installation offers many benefits:
1. Energy Efficiency: Lower Bills
Correct installation saves up to 20–30% on electricity bills. Proper airflow and refrigerant levels ensure the AC doesn’t overwork.
2. Warranty Compliance: Protect Your Investment
Most manufacturers require professional installation to keep the warranty valid. DIY installation can void it.
3. Safety Assurance: Prevent Hazards
High-voltage wiring and refrigerant handling require expertise. Poor installation can lead to leaks or electrical risks.
4. Longevity: Extend System Life
A correctly installed AC lasts longer, with fewer repairs and lower maintenance costs.
FAQs on Standard AC Installation
Q1: How long does a standard AC installation take?
On average, it takes 4–6 hours. However, it may take longer for large systems or complex setups.
Q2: Is professional AC installation worth the cost?
Yes, it ensures:
-
Correct placement and airflow
-
Energy efficiency through proper refrigerant charging
-
Warranty compliance
-
Safety checks for electrical and refrigerant systems
Over time, this saves money on power bills and repairs.
Q3: What is the ideal maintenance frequency for AC units?
Experts recommend servicing your AC once a year, ideally before summer. For heavy usage, consider bi-annual maintenance for better efficiency.


